I really love homemade yogurt. Tangy and smooth, almost sweet. Creamy and lovely to gaze upon, especially when stirred into fresh blue berries, strawberries or bananas. Tasty on it's own or with real maple syrup and some raisins.
We all have seen the commercials for yogurt and we know some have live Bactria cultures that are suppose to help our digestion and immune systems. I want some of that goodness for myself and my family but I'm not going to pay what they are asking. Plus, a lot of the yogurt on the shelves are loaded with sugar, or worse, artificial sugar, and are "low in fat."
I don't want the sugar but I do want the fat.
I read how to make yogurt this way on line somewhere but I cannot find it now. This is my take on how to make yogurt without a yogurt maker. When space is limited, and storage space even more so, items in your kitchen must serve more than one purpose. Also, I don't want to spend my husbands hard earned money on something we can do without.
The tools...
*thermometer
*whisk
*a pot, at least 8 cup capacity
*ladle
*small bowl
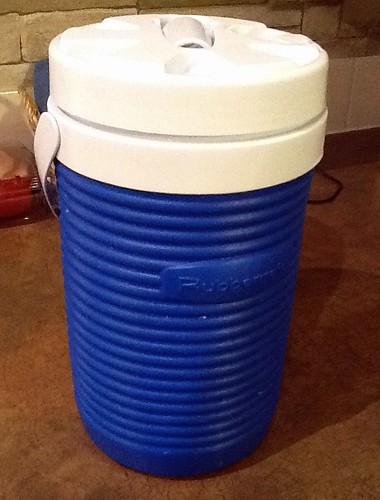
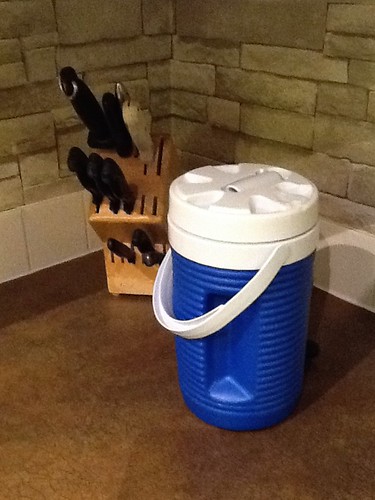
*an insulated beverage container, 6-8 cup capacity. This is your incubator.
I use this Rubbermaid one.
Ingredients needed...
*a package of yogurt starter
*4 cups whole milk (Using UHT pasteurized milk will not work. UHT changes the milk into something the yogurt culture can not use. Neither should you...ever. Using whole milk will give a thicker and creamier yogurt than if you use lower fat.)
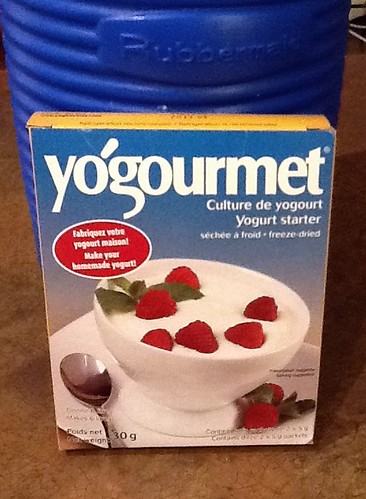
This is the starter that I use. I don't know anything about other cultures but if the package of starter says to incubate at around 110* for 4-6 hours, these directions should work for you. The bacteria are L.bulgaricus, S.thermophilus, L.acidophilus.
That's all we need for thick, delicious, healthy, frugal yogurt.
Okay, here we go.
Fill your Rubbermaid incubator with very hot tap water and put the lid on. You are preheating the container so it will stay warm for the few billion organisms you are trying to multiply.
Pour the milk into the pot and put in the thermometer (don't let it touch the bottom). Heat the milk over medium low, whisking gently but frequently, until the temperature reaches 180*F. Don't leave the stove. I have boiled over more milk than I care to remember because I went to do "something" that would just take a "minute."

Now, we cool down the milk in a cold water bath or just let it cool on its own. If it cools down to much you can always warm it a bit on the stove again. You want the temp to be no more than 115* and no less than 110*.
Using the ladle, put about a cup of warm milk in a bowl. Gently stir in the starter using the whisk. It might take a little while for the starter to dissolve so be patent and stir gently. Pour the cultured milk back into the pan of warm milk and, gently, stir well.
Pour the hot water out of the incubator, quickly dry it out and fill it with the warm, cultured milk. Screw on the lid and place it in a spot where it won't be disturbed for 4 hours.
After four hours, remove the lid and put it in the fridge to cool down and greatly slow down the culturing. After the yogurt is cold, you can put it into a different container.
I usually make my yogurt before I go to bed and put it in the fridge in the morning, 8-10 hours later and it tastes fantastic.
When making yogurt using the packaged starter the directions on the package say 4 cups of milk, like I have writen here, but I have found the package will culture 5 cups of milk. Also, you can use any yogurt that has live culture as a starter. The next batch I make I will use 6 cups of milk and about 3 tbsp of yogurt from this batch. The yogurt will get "stronger" tasting with each succesive batch. Quite tangy. Make your toes curl. After about 4 or 5 batches it's time to use a packaged starter again.
We all have seen the commercials for yogurt and we know some have live Bactria cultures that are suppose to help our digestion and immune systems. I want some of that goodness for myself and my family but I'm not going to pay what they are asking. Plus, a lot of the yogurt on the shelves are loaded with sugar, or worse, artificial sugar, and are "low in fat."
I don't want the sugar but I do want the fat.
I read how to make yogurt this way on line somewhere but I cannot find it now. This is my take on how to make yogurt without a yogurt maker. When space is limited, and storage space even more so, items in your kitchen must serve more than one purpose. Also, I don't want to spend my husbands hard earned money on something we can do without.
The tools...
*thermometer
*whisk
*a pot, at least 8 cup capacity
*ladle
*small bowl
*an insulated beverage container, 6-8 cup capacity. This is your incubator.
I use this Rubbermaid one.
Ingredients needed...
*a package of yogurt starter
*4 cups whole milk (Using UHT pasteurized milk will not work. UHT changes the milk into something the yogurt culture can not use. Neither should you...ever. Using whole milk will give a thicker and creamier yogurt than if you use lower fat.)
This is the starter that I use. I don't know anything about other cultures but if the package of starter says to incubate at around 110* for 4-6 hours, these directions should work for you. The bacteria are L.bulgaricus, S.thermophilus, L.acidophilus.
That's all we need for thick, delicious, healthy, frugal yogurt.
Okay, here we go.
Fill your Rubbermaid incubator with very hot tap water and put the lid on. You are preheating the container so it will stay warm for the few billion organisms you are trying to multiply.
Pour the milk into the pot and put in the thermometer (don't let it touch the bottom). Heat the milk over medium low, whisking gently but frequently, until the temperature reaches 180*F. Don't leave the stove. I have boiled over more milk than I care to remember because I went to do "something" that would just take a "minute."
Now, we cool down the milk in a cold water bath or just let it cool on its own. If it cools down to much you can always warm it a bit on the stove again. You want the temp to be no more than 115* and no less than 110*.
Using the ladle, put about a cup of warm milk in a bowl. Gently stir in the starter using the whisk. It might take a little while for the starter to dissolve so be patent and stir gently. Pour the cultured milk back into the pan of warm milk and, gently, stir well.
Pour the hot water out of the incubator, quickly dry it out and fill it with the warm, cultured milk. Screw on the lid and place it in a spot where it won't be disturbed for 4 hours.
After four hours, remove the lid and put it in the fridge to cool down and greatly slow down the culturing. After the yogurt is cold, you can put it into a different container.
I usually make my yogurt before I go to bed and put it in the fridge in the morning, 8-10 hours later and it tastes fantastic.
When making yogurt using the packaged starter the directions on the package say 4 cups of milk, like I have writen here, but I have found the package will culture 5 cups of milk. Also, you can use any yogurt that has live culture as a starter. The next batch I make I will use 6 cups of milk and about 3 tbsp of yogurt from this batch. The yogurt will get "stronger" tasting with each succesive batch. Quite tangy. Make your toes curl. After about 4 or 5 batches it's time to use a packaged starter again.
Great! I make my yogurt differently. I use a ratio of 2 c powdered milk, 2 c room temp water, 2 c quite warm water and 2 heaping Tbs yogurt (I use Greek as it is thicker and really yummy). Whisk together. I double this, put it in 3 quart jars and put the quart jars in a slow cooker filled with warm water. Leave slow cooker on keep warm overnight. Easy. Then you can use the last of this batch of yogurt to start your next batch. Sometimes I add real vanilla extract to each jar for a different flavor.
ReplyDeleteI love learning different ways to do things. I think I might try you way but with warm milk ( not powdered) to see how it compares. I'm heating milk right now for yogurt...I wonder if I have jars that will fit in my slow cooker.
DeleteWell, last night I made yogurt using my slow cooker. Unfortunately, on warm the temperature still runs at 150*. That temperature successfully killed my yogurt culture. Oh well. I'm going to use the same milk and try again but using my thermos. Thank-you for the idea, Carolyn. I'm sure it works great if your slow cooker's warm stays cooler than mine.
DeleteI received a yogurt that works at room temperature. Have used it well over 7 years and it still works. I simply take 2 spoons of the yogurt and stir it into the milk, cover and let sit on the counter. Next day I have fresh yogurt. We live in Canada too and I would love to give you of my yogurt as it is so much more simple to make. (we make lactose free yogurt with it but you may use regular milk)
ReplyDelete